A Seller's Timeline: 90 Days Before Listing Through Closing
This printable countdown shows Southwest Riverside County home sellers what to do and when, from the first agent interview to handing over the keys: three months of decisions, preparation, disclosure, marketing, negotiation, and closing steps laid out phase by phase. Every home is different and timelines vary, so treat this as a general guide and confirm the actual dates for your sale with your agent and escrow officer. It is not legal or tax advice.
Tip: in the print dialog, choose "Save as PDF" to keep a digital copy of your checklist.
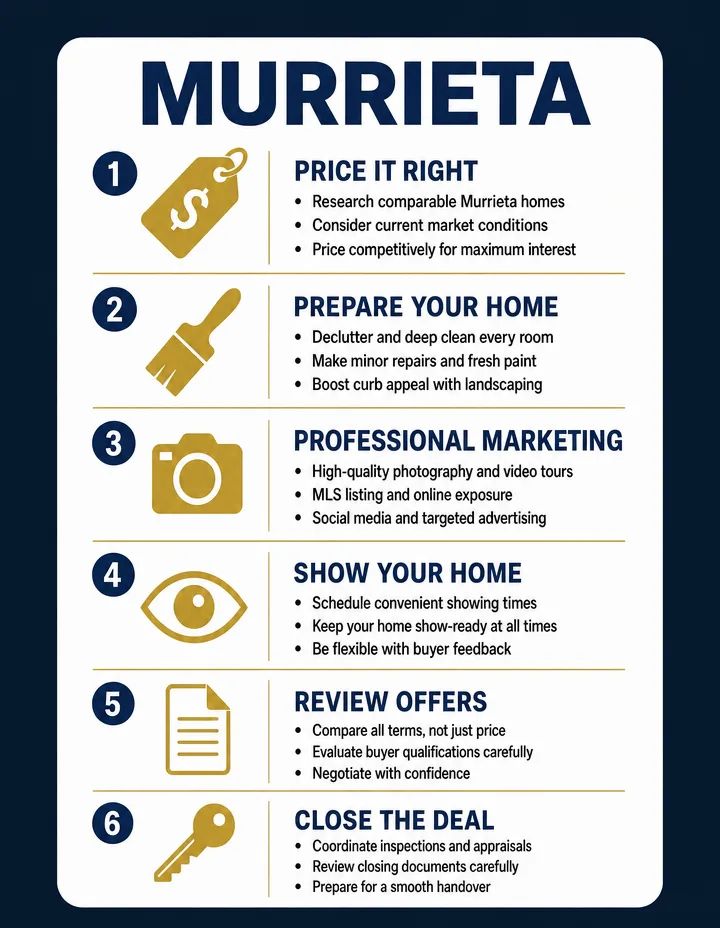
Four Phases, One Countdown
The 90 days divide into four phases. The ranges are typical timing, not promised dates: your sale may move faster or slower depending on the market, the home, and the contract you negotiate.
Decide and Prepare
The first month is about decisions, not deadlines. This is when you choose your listing agent, settle your goals and the condition questions, and line up the paperwork that makes the rest of the process smoother. Skip this phase and the decisions only get harder as the launch date approaches. The full seller sequence, from the first conversation through closing, is laid out in our complete selling guide for Murrieta and Southwest Riverside County.
- Checklist item 1 of 9
Interview and compare listing agents
Ask about their local sales data, how they evaluate comparable sales, what the marketing plan actually includes, and how often they communicate. A good listing conversation should feel educational, not rushed, and it should end with an estimated seller net sheet you can compare across agents.
- Checklist item 2 of 9
Discuss your goals and target timeline
Share when you want to move, whether you are planning a next purchase, and what the sale needs to accomplish. Your timeline shapes pricing, preparation, and the ideal listing launch window.
- Checklist item 3 of 9
Ask about fees and the seller net estimate
Brokerage compensation is negotiable in California and costs vary by transaction, so ask what fees may apply and what an estimated seller net sheet includes before you sign a listing agreement.
- Checklist item 4 of 9
Order a pre-listing home inspection
Learning about the home’s condition before buyers do gives you time to get bids and make calm decisions instead of reacting during escrow. Not every seller needs one; ask your agent whether it fits your situation.
- Checklist item 5 of 9
Decide as-is vs. repairs
Weigh the time and budget for repairs against an as-is listing priced to match condition. The choice is about positioning, not quality, and disclosure duties apply either way.
Compare the as-is vs. repairs paths - Checklist item 6 of 9
Clear and declutter room by room
Work through each room over a few weeks rather than one exhausting weekend. Start with the rooms buyers see first: the entry, the main living area, and the kitchen.
- Checklist item 7 of 9
Start the deep clean
Walls, baseboards, windows, carpets, and the kitchen and baths carry the most weight in photos and tours. A deep clean ahead of photo day means the photographer captures the home at its best.
- Checklist item 8 of 9
Gather HOA documents, owner manuals, and warranties
If the home is in an association, collect the HOA documents early; find the manuals and warranties for major systems and appliances. Having them organized makes the disclosure package and escrow smoother.
- Checklist item 9 of 9
Set your asking-price strategy with your agent
Compare recent sales, active competition, condition, and current buyer response before deciding on the launch price, and agree on how you will read the market after listing.
This window is also the best time to ask the questions you might be worried about: what the home is really worth, what repairs matter, and what you would net at different sale prices. That is the whole point of the early conversation.
Price, Market, Disclose
Now the plan becomes a listing. Repairs get finished, the home gets photographed, and the disclosure package gets built and delivered early so buyers can move forward with confidence instead of surprises. The week-by-week cleaning, staging, and photo-day steps live in the pre-sale home preparation guide, and the order of the documents is explained in our California seller disclosures guide.

- Checklist item 1 of 6
Make the agreed repairs and touch-ups
Finish the fix list you committed to and schedule anything still outstanding so it does not collide with photo day or the launch. Small items left undone tend to resurface in the buyer’s inspection.
- Checklist item 2 of 6
Order pre-listing professional services
Staging, deep cleaning, carpet care, and yard service scheduled on a calendar keep the home show-ready for the whole listing period, not just launch week.
- Checklist item 3 of 6
Schedule professional photography and prepare for photo day
Photography is the first impression buyers get online, so the home needs to be at its best on that day. The detailed prep steps, including the weeks around photo day, are covered in our pre-sale preparation guide.
See the pre-sale home preparation guide - Checklist item 4 of 6
Build and deliver the disclosure package early
Prepare the transfer disclosure statement and related documents before listing. Lead-based paint, well and septic, smoke and carbon monoxide, and fire-safety items come first; walk through the full package and what applies to your property in our disclosures guide.
Read the California seller disclosures guide - Checklist item 5 of 6
Confirm all disclosures are complete and delivered
A complete package delivered early avoids end-of-escrow surprises and lets buyers and their lender review everything in time. Treat this as a finish line before the launch, not a task for escrow.
- Checklist item 6 of 6
List the home and review showings and feedback
Once the home is live, monitor showings, buyer comments, and competing activity. Patterns in feedback matter far more than any single showing, so let real responses guide any pricing conversation.
Ask your agent when the review period for the listing presentation ends, and how showing feedback will be reported to you. Clear expectations about feedback turn the first two weeks on market into useful market data.
Review Offers and Open Escrow
Offers arrive and the transaction takes shape. Evaluate the whole offer, not just the price, and negotiate terms that fit your goals before anything is signed. Our guide to evaluating an offer in Murrieta and Temecula walks through the terms that matter, and this phase typically overlaps with the launch response, so it moves quickly once the first offer lands.
- Checklist item 1 of 5
Review and evaluate offers with your agent
Compare price, financing, contingencies, earnest money, timeline, possession, and any requested credits or rent-back terms.
Read how to evaluate an offer in Murrieta and Temecula - Checklist item 2 of 5
Negotiate
Decide which terms matter most: price, closing date, repairs, credits, and possession. Negotiation covers more than the purchase price, and the best outcome is the one that fits your goals for the whole transaction.
- Checklist item 3 of 5
Accept an offer and open escrow
Once both parties sign, escrow opens and the contract’s dates and deadlines begin running. Confirm the escrow company, the closing date, and who is responsible for each step.
- Checklist item 4 of 5
Deposit earnest money
The buyer deposits earnest money per the contract. Confirm the amount, the deadline, and where the funds are held, and have the details in writing.
- Checklist item 5 of 5
Provide buyer inspection access and respond to requests
Buyers typically order inspections soon after escrow opens. Respond to access requests promptly, and evaluate any repair requests against the contract, the condition of the home, and the current market rather than reacting to the first number.
This is where an agent earns their keep: evaluating offers for risk, negotiating terms, and keeping the calendar straight as the transaction dates start to stack up.
Toward Closing
With inspections, appraisal, and financing underway, the final weeks are about deadlines, paperwork, and a clean handoff. For the full step-by-step escrow picture, see our walkthrough of what happens during escrow in a California sale; this checklist keeps the seller side of the calendar sharp.
- Checklist item 1 of 5
Track contingency deadlines
Inspection, appraisal, loan, and HOA contingencies each have their own dates. Ask your agent to confirm every deadline in writing and keep the disclosure and discovery items moving so nothing quietly lapses.
- Checklist item 2 of 5
Coordinate the buyer’s final walkthrough
The buyer walks the property near closing. Have agreed repairs finished and the home in the condition the contract expects, including any agreed-upon items and personal property removals.
- Checklist item 3 of 5
Review the Closing Disclosure before signing
Escrow provides the Closing Disclosure that itemizes the final numbers. Review it carefully, ask questions, and compare it with the estimated net sheet from the listing conversation so nothing is a surprise at the table.
- Checklist item 4 of 5
Arrange your move-out and prepare the home for possession
Schedule movers, utility transfers, and a final clean so the home is ready on the possession date, whether that is closing day or the end of a negotiated rent-back period.
- Checklist item 5 of 5
Confirm keys, move date, and possession terms
The contract specifies keys, garage remotes, and who occupies the home after closing. Confirm the details in writing with your agent before the final walkthrough; possession does not automatically continue past closing unless the contract says so.

Sellers often ask whether they can stay a little longer after closing. A seller rent-back is possible when it is negotiated in the contract, so raise it during the offer review, not on move-out day.
Keep These Dates Straight
A seller's agent exists partly to keep dates straight. Your agent tracks disclosure and contingency deadlines so nothing quietly lapses, but you should always see the key dates in writing.
- Ask your agent for the escrow timeline in writing, and ask escrow to confirm each deadline in writing as it comes up.
- There is no universal escrow period. The length of escrow is negotiated in the purchase agreement, and every date in the transaction flows from that contract.
- Disclosure and contingency deadlines are the ones that most often creep up on sellers. Put them on a single calendar the day escrow opens.
Typical Timing, Not Promises
The day ranges in this timeline are typical patterns for Murrieta, Temecula, and Southwest Riverside County sales, presented as a general guide so you can plan ahead. Your actual timing depends on the market, the home, the contract, buyer financing, inspections, and appraisal. None of this page is legal, tax, or financial advice; ask your agent, escrow officer, lender, and qualified professionals for advice specific to your situation. We are here to help you ask the right questions, not to rush or push you into a date.
The Selling Guide, Phase by Phase
These guides go deeper into each phase of the countdown, from preparation and disclosures to evaluating offers and escrow.
Complete Seller Guide
The full selling process for Murrieta and Southwest Riverside County.
Read the GuidePre-Sale Home Preparation
Room-by-room cleaning, staging, and presentation steps before photo day.
Read the GuideCalifornia Seller Disclosures
The disclosure documents that apply in a California sale and when to deliver them.
Read the GuideHow to Evaluate an Offer
Compare price, financing, contingencies, and terms before you sign.
Read the GuideWhat Happens During Escrow
A step-by-step look at escrow in a California residential sale.
Read the GuideSell As-Is or Make Repairs?
Decide how to bring the home to market based on time, budget, and condition.
Read the GuidePut Your 90-Day Countdown to Work
Laura and Cheryl walk sellers through this exact timeline, one decision at a time, and keep the dates straight once escrow opens. Whether you are three months out or just starting to think about it, the conversation is free and there is no obligation to list.
Equal Housing Opportunity. Laura Holbert, Broker, Realtor®, CA DRE# 01932682 · Cheryl Shadden, Broker, CA DRE# 01932888 · Team Integrity Realty.
Last reviewed and updated: November 14, 2026